Key words: shortcuts keyboards hotkeys ctrl control shift quick
Ctrl-F Find
Ctrl-G Gestures
Ctrl-H Chat History
Ctrl-I Inventory
Ctrl-L Link (selected objects in edit)
Ctrl-M World Map
Ctrl-P Preferences
Ctrl-R Run Mode
Ctrl-T Instant Message
Ctrl-U Upload Image
Ctrl-Z Undo (once while in edit - chat window off)
Ctrl-Alt-Shift-D Open/Close Debug menu (some systems require Ctrl-Shift-Alt-D)
Ctrl-Alt-M Mouse Moves Sun (requires Debug menu on)
Ctrl-Alt-T Highlight Transparent
Ctrl-Alt-6 All Fog Off
Ctrl-Shift-A Start/Stop Movie to Disk
Ctrl-Shift-L Unlink (selected objects in edit)
Ctrl-Shift-M MiniMap
Ctrl-Shift-N Force Sunset (requires Debug menu on)
Ctrl-Shift-S Snapshots
Ctrl-Shift-1 Sim Stats (you will need to turn off the minimap to view the full stats page)
Ctrl-Shift-3 Texture Console (to view textures on a particular object right click and go into
edit and then press ALT 3 , the textures for all sides of that object will be
highlighted in yellow)
Ctrl-Alt-Shift-= Turn particle effects on/off.
Ctrl-Alt-Shift-3 Remove all Linden trees. This is a toggle... press again to turn trees back on.
Ctrl-Alt-Shift-5 Remove ground cover. This is a toggle... press again to turn ground cover back on.
Shift and Drag Copy object in edit
Pan and Zoom Camera: To pan around an object hold down the Alt key and left-click an object or avatar then use the left and right arrows to pan around & page up and page down to zoom in & out (this function goes circular around an object).
Strafe Camera: Hold down Ctrl-Alt-Shift and left-click an object or avatar then use the arrow keys to strafe left right up or down. (this goes vertical and horizontal on an object view).
Showing posts with label Tips. Show all posts
Showing posts with label Tips. Show all posts
Friday, June 19, 2009

Saturday, February 23, 2008
Signing in Issues?
Some times you try to sign in SL and you hang up forever orrrrrr you can’t sign in at all.
Do these steps and see if it helps:
1.Uninstall Second Life (Sounds scary I know)
2. Delete the Application Data Folder (It’s located in C:\Documents and Settings\”User Name”\Application Data\Second Life.)
When you remove that folder it insures that you won’t have the same errors when you do the next steps.
3. Delete Browser Cookies and Cache Files
4. Empty Recycle Bin
5. Defrag your computer (I about do these 3 or more times a week)
6. Shut down your computer
7. Shut down your Router\Modem (My service providers says about 3 minutes)
8. Bring Router\Modem up then Computer
9. Reinstall Second Life
10. Check your Fire Wall
A Tip: Some times you can’t see the *hidden folders* Open up Explorer\Tools\Folder Options\ View\Show hidden files and folders
Do these steps and see if it helps:
1.Uninstall Second Life (Sounds scary I know)
2. Delete the Application Data Folder (It’s located in C:\Documents and Settings\”User Name”\Application Data\Second Life.)
When you remove that folder it insures that you won’t have the same errors when you do the next steps.
3. Delete Browser Cookies and Cache Files
4. Empty Recycle Bin
5. Defrag your computer (I about do these 3 or more times a week)
6. Shut down your computer
7. Shut down your Router\Modem (My service providers says about 3 minutes)
8. Bring Router\Modem up then Computer
9. Reinstall Second Life
10. Check your Fire Wall
A Tip: Some times you can’t see the *hidden folders* Open up Explorer\Tools\Folder Options\ View\Show hidden files and folders
Thursday, February 21, 2008
Terraforming..SL style
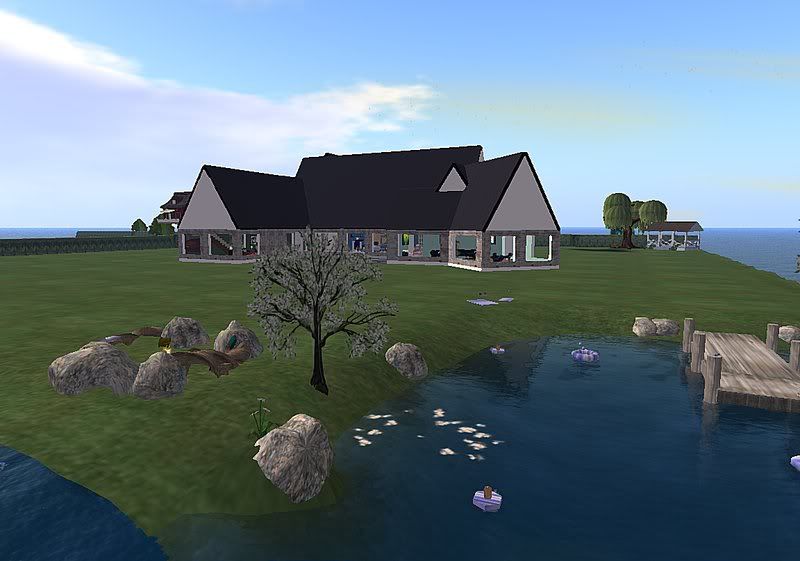
Like I said, this wouldn’t be my last design of the island works…we were thinking, Ok, so Anwell is Celtic, which makes me think of green… then why a sandy beach like island?

SL has 3 island shapes to chose from, BUT!! If you check out their web page on the .raw files you will see this perfectly square one called *Flat Green*. I guess to them it’s boring but it fit my needs perfectly.
I uploaded the .raw file to the region, which usually takes a minute or two and is kind of cool to watch as it updates. It was too high for my needs, so out came the lawnmower/terra former again and I lowered it.
To do that you right click the land and a pie menu chart comes up. Pick Edit Terrain...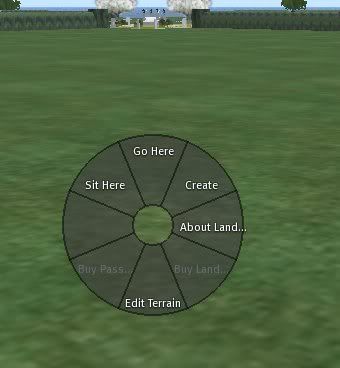
Now, you have another tool box that pops up. This has a rump load of buttons to you use. Don't be a skeerdy cat and try them out.
The Selection button is similar to the Selection button when you build to link things. Just Click the selection button and then click on the ground. That makes this nifty area to work with on the ground only.
Then you can choose one of the other radio buttons to do what ever you need after you lower or raise or smooth the land then click Apply to selection.
There is another button on the side that has a pull down arrow for Small Medium or Large areas to work with. I usually use the small button so I have more control.... I mean really how much control do you need to make a flat lot?
SL has, I guess, you can call levels or land heights measurements.
0-20 meters are below water levels to the water line, so if you have land with a Z value at 21.000 meters, it's one meter above the water line.
I think you can heighten all the way up to 255, which makes a pretty tall mountain. I set the whole island with a Z of 22 so that means it's 2 WHOLE meters above the water line with lil ziggy zags and bumps at the sims edge with each 1/4 section having a *poolish* area and dock and rocks.
This time the land is all green with a hedge splitting it into 4 quarters and a common area in the middle with a bridge some swimming swans and sitting areas.
Flat and boring I know, but I plan on letting the renters do there own lawnmowing when they move in.
Thursday, February 14, 2008
Sim Owner!
This is Anwell Island a Celtic name that means Beloved.
Her reply: You have enough shoes....
Humm, I begged... I TPed her in.. I changed the Location on the TP request to *Cheap shoes*
.... I waited...
WABAM she TPs in and of course my screen flakes out so I have to reboot... :(
By the time I was signed back on she's complaining and gone..... * I didnt see any shoes just empty land*
Blah..... so much for my fun suprise to her...
I worked and played alone....
Before all the work, I thought I might take a dip.


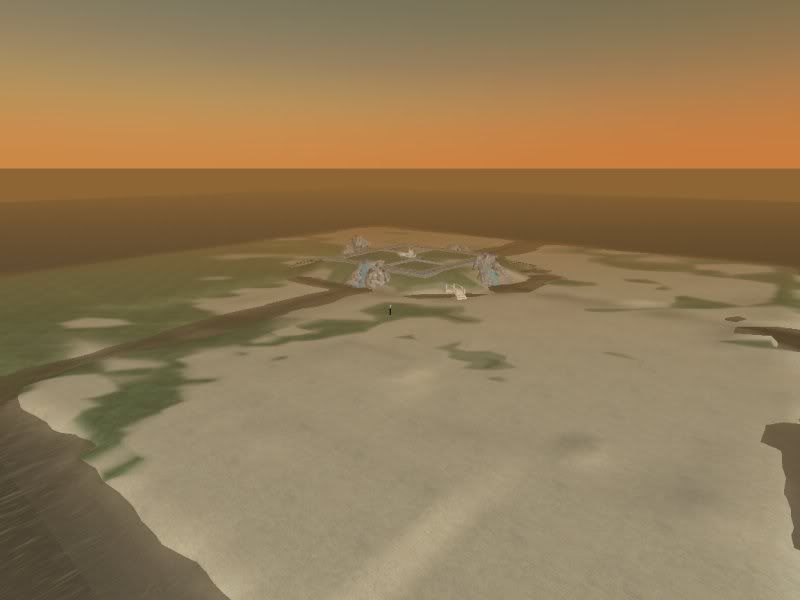 This won't be my last design I know!

I purchased this on Monday and just so happend to do a search in the Map toolbar to find an Anwell Region listed, TPed there and I found this..... I had to look on the title bar of my screen and then edit land just to confirm that it was mine.... afterwards I let out a yelp of happiness.
I also recieved an email about an hour later from Linden Labs confirming my Sim was ready.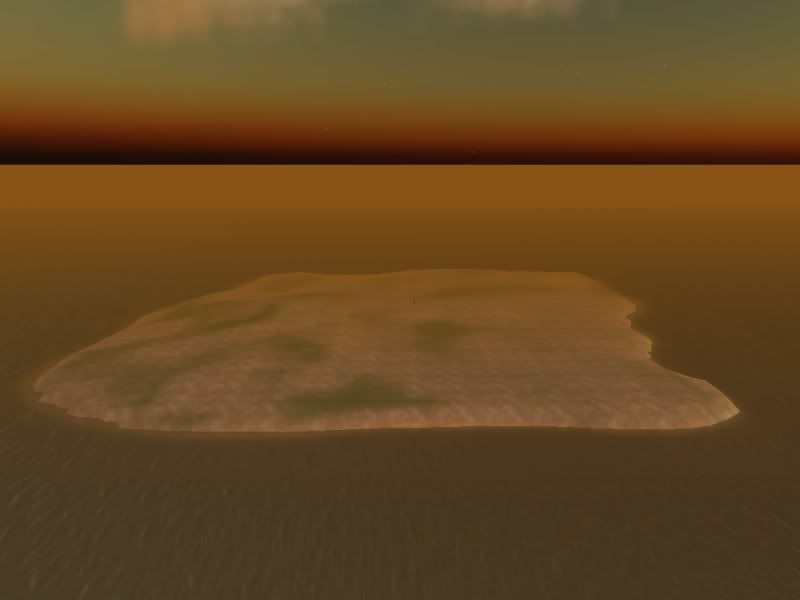
When you first purchase an Island from SL you have 3 shapes of land to chose from. I picked number 2. (really there are 4)
Oh so barren and lonely looking....
What to do!?
 15000 prims to use OMG!
Notice there is one already used?
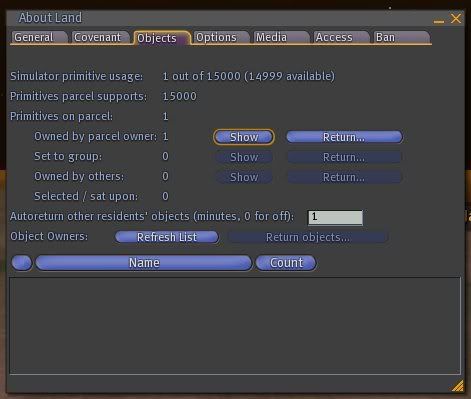 It's the mystery Linden box left when dropping the island. I snagged that up for a momento and put it in a special folder...Thanks Leo Linden!

All day I was excited to show my partner the new Island... waited and waited...
She popped on and I asked if she might not be to busy to look at some *shoes*
Her reply: You have enough shoes....
Humm, I begged... I TPed her in.. I changed the Location on the TP request to *Cheap shoes*
.... I waited...
WABAM she TPs in and of course my screen flakes out so I have to reboot... :(
By the time I was signed back on she's complaining and gone..... * I didnt see any shoes just empty land*
Blah..... so much for my fun suprise to her...
I worked and played alone....
Before all the work, I thought I might take a dip.
Me, doing some land flattening...I made this terraformer to help me out.
Of course you can use the land tools as well. I just wanted to mow some lawn. :D
End result, a mound in the middle with a park area- waterfalls-- canals surrounding the mound and exending out to Linden waters....
This won't be my last design I know! Tuesday, February 5, 2008
Rental Homes
This is our old rental place, it was pure heaven here...but believe it or not too small!

Make sure you can make the payments and to whom you make them and what venue, be it Pay Pal or just straight Lindens on a monthly or weekly basis. Check the rules on what type of house you can buy/build, like some places have rules on square footage or style or how high. Of course if you are in a close area, get to know the neighbors, make sure there aren’t any annoying spinning items, or shouting vending machines.
 So we decided to rent or lease, what ever you want to call it, for a tester of sorts. We searched high and low for an empty lot to use with plenty of prims and space and privacy and hopefully no or very little lag.
I wanted a residential only area, since that’s what we would be using it for as a home.
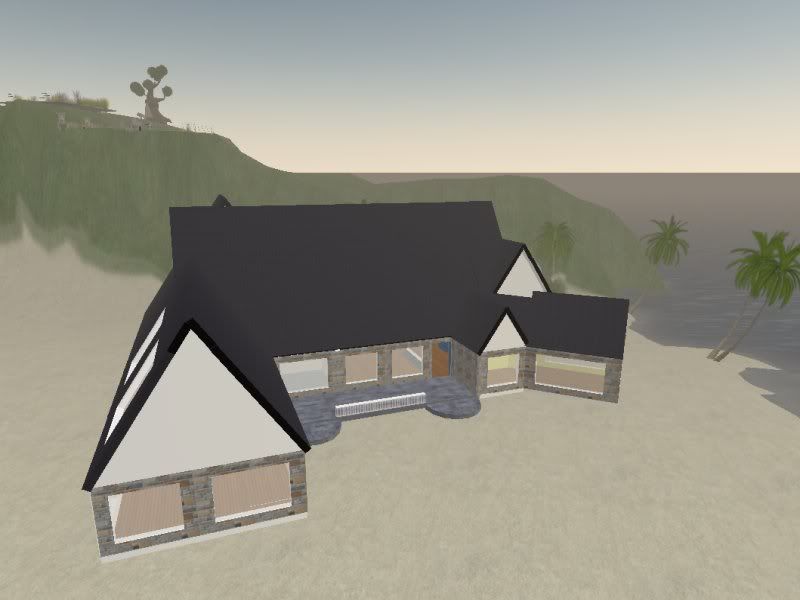 We were also looking at homes and home styles and furniture, I found a very nice home but there were some things about it I didn’t like. (Of course). Building is a part of learning
So we chose to build our own home based very much on the home we both liked. I don’t plan on selling this home as you can very easily purchase one similar at Castle Rentals, AQUA Mainstore, http://slurl.com/secondlife/Glinda/192/58/90 Finally we found the perfect lot, on the beach and secluded with enough prims for an army! The house would fit nicely here.
 If you are a moon rise or sun set watcher make sure you will have the views.
How do you tell about the prims? If you right click the land you get a pie chart and if you chose About Land a box will pop up.
These Tabs totally freak me out right now.
There you can see if it’s on Mainland or an Estate, how many prims it supports, if there is a covenant. Many more things about it if you chose to look at the tabs, plus you will need to know this trick when you do decide to rent the property, to set up multimedia items, deeding the property to a group, banning people, etc.
Make sure you can make the payments and to whom you make them and what venue, be it Pay Pal or just straight Lindens on a monthly or weekly basis. Check the rules on what type of house you can buy/build, like some places have rules on square footage or style or how high.
Of course if you are in a close area, get to know the neighbors, make sure there aren’t any annoying spinning items, or shouting vending machines. 


Thursday, January 24, 2008
Land Shopping?
I’m in the process of buying/renting some land. I’ve *rented* three different places, ok I’ve not actually paid for ANY of them. The first was my partners condo she received for working at a club... wasn’t *my* home.
The second was more so my home, same deal – different place and I lived alone, I received that rent free as I worked for my employer. I felt like a big mooch, all I did was bounce the club --- nothing beneficiary for them.
The third and current place is like a dream home, on the beach in a beautiful area – of course my partner pays for it all…. :(
All three places I’ve not had a problem with the landlord, from what I gather I’m lucky (OK, we umm she was). Only one incident with some particles that refused to leave has been my biggest issue. --Yeah thats me the particle bandit.
So now its time to make an investment and see where it goes, I have some friends that are opening up a store (landmark to be placed here soon). They want me to sell some of my items I’ve made. I have no clue what to price them as and scared to death people will hate what I’ve made or think it’s cheap.
With that revenue it can go to some of the tier payments… boy aren’t I a big hopeful thinker?
Now the search is on!
First, you need to decided if you want to really *buy* land or rent/lease. On Main Land you can purchase land from Linden Labs or a resident.
You have to be a premium member to buy land but to rent/lease just make the payments to the *landlord* or Estate owners.
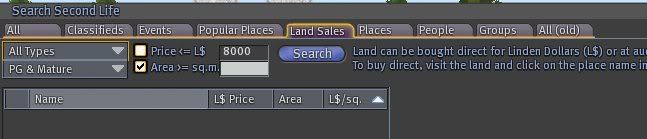
You can search for Land with the Search tools in SL, just toggle between the types of land you want and enter. There will be a listing just as if you were searching for that favorite club or store. Click the Teleport link and check the property out.
The second was more so my home, same deal – different place and I lived alone, I received that rent free as I worked for my employer. I felt like a big mooch, all I did was bounce the club --- nothing beneficiary for them.
The third and current place is like a dream home, on the beach in a beautiful area – of course my partner pays for it all…. :(
All three places I’ve not had a problem with the landlord, from what I gather I’m lucky (OK, we umm she was). Only one incident with some particles that refused to leave has been my biggest issue. --Yeah thats me the particle bandit.
So now its time to make an investment and see where it goes, I have some friends that are opening up a store (landmark to be placed here soon). They want me to sell some of my items I’ve made. I have no clue what to price them as and scared to death people will hate what I’ve made or think it’s cheap.
With that revenue it can go to some of the tier payments… boy aren’t I a big hopeful thinker?
Now the search is on!
First, you need to decided if you want to really *buy* land or rent/lease. On Main Land you can purchase land from Linden Labs or a resident.
You have to be a premium member to buy land but to rent/lease just make the payments to the *landlord* or Estate owners.
You can search for Land with the Search tools in SL, just toggle between the types of land you want and enter. There will be a listing just as if you were searching for that favorite club or store. Click the Teleport link and check the property out.

What I've learned so far:
Hit Ctrl+Alt+Shift+P on your keyboard to see parcel boundary lines, this brings up a faint red line around the border. Make sure you know what you're purchasing!
Take note of the About Land listings, the land's area is in square meters.
Read the Primitives Parcel Supports entry in the About Land window's Objects tab. This indicates how many primitives you can place on this land. In other words if you have a 300 prim house you can't place this on a 117 prim parcel.
If you *buy* land from an Estate, it CAN be reclaimed when ever the estate owner pleases. Be it that they failed to pay Linden Labs their tier or they sell the land to someone else, who now decides to remove everyone. I guess thats really considered *leasing* the land not purchasing it.
Thursday, December 27, 2007
Need a kid?
Welp, we found a new venture in the wide wide world of SL its called ADOPTION.
Oh man, well I haven’t really talked about this much because I’m semi unsure of the whole process. This isn’t just for everyone on Second Life, just as it might not be to go to a combat Sim, or any other Roll Play Sim.
First off, in the Search button you can type Adoption and a load of places come up, at the time of this posting I found over 12 adoption sites. Find one that looks promising and TP (teleport) there. You will usually see some sort of house and toys and junk all over the yard. With kids bouncing all over the place, blasting gestures and kid noises, it can be very confusing.
[pic]
If you go inside there will usually be panels with pictures of children on the walls wanting to be adopted into a family. Kind of like a Myspace for kiddies! On the other side will be the parents section looking for kids. A lot of places have an area for single parents and couples.
[pic]
Some places have, what I call the *like system*. Click on the picture panel and you can read the child’s profile and you can choose *like* if they have similar interests in you. For a small weekly or monthly fee you can create a panel and profile for everyone to see and decide on.
[pic]
Of course if you are a prospective parent you have a picture profile up as well, I guess so the kids can click on you too.
[pic]
This, in turn will help you into a week long *trial* process of getting to know one another. How you go about doing that is your choice. If you see you aren’t going to work out then shake hands and part ways.
Be big about it, not every child is going to be your match or possibly your partners, it takes time.
Some thoughts on this: It can be a interesting and rewarding experience if you let it. Gaining a friendship and learning a bit about your own self.
Remember these *kids* are adults as well out there, they aren’t REALLY children running around SL. They need to be treated with respect as you would anyone else on SL, not as pets or something to pass the time of day with.
However, since they are (or supposed to be) adults in one sense, they should also return the respect, one thing I can’t stand is a bratty or selfish *kid* on SL and they get away with being a punk just because they are *6*. That’s BS in my book.
If you do decide to take the plunge into this, I hope only happy and healthy times for you!
Oh man, well I haven’t really talked about this much because I’m semi unsure of the whole process. This isn’t just for everyone on Second Life, just as it might not be to go to a combat Sim, or any other Roll Play Sim.
First off, in the Search button you can type Adoption and a load of places come up, at the time of this posting I found over 12 adoption sites. Find one that looks promising and TP (teleport) there. You will usually see some sort of house and toys and junk all over the yard. With kids bouncing all over the place, blasting gestures and kid noises, it can be very confusing.
[pic]
If you go inside there will usually be panels with pictures of children on the walls wanting to be adopted into a family. Kind of like a Myspace for kiddies! On the other side will be the parents section looking for kids. A lot of places have an area for single parents and couples.
[pic]
Some places have, what I call the *like system*. Click on the picture panel and you can read the child’s profile and you can choose *like* if they have similar interests in you. For a small weekly or monthly fee you can create a panel and profile for everyone to see and decide on.
[pic]
Of course if you are a prospective parent you have a picture profile up as well, I guess so the kids can click on you too.
[pic]
This, in turn will help you into a week long *trial* process of getting to know one another. How you go about doing that is your choice. If you see you aren’t going to work out then shake hands and part ways.
Be big about it, not every child is going to be your match or possibly your partners, it takes time.
Some thoughts on this: It can be a interesting and rewarding experience if you let it. Gaining a friendship and learning a bit about your own self.
Remember these *kids* are adults as well out there, they aren’t REALLY children running around SL. They need to be treated with respect as you would anyone else on SL, not as pets or something to pass the time of day with.
However, since they are (or supposed to be) adults in one sense, they should also return the respect, one thing I can’t stand is a bratty or selfish *kid* on SL and they get away with being a punk just because they are *6*. That’s BS in my book.
If you do decide to take the plunge into this, I hope only happy and healthy times for you!
Friday, August 3, 2007
Post Cards Or How to Fill Ones Email!
Posts Card From The Edge..... Wait..... Second Life.
Post cards are just like taking that cool snap shot of someone or some event in SL but this one you can send to even non SL folks right to their e-mail.
First off you Take a Snap shot just as you do any snapshot in SL. Making Snapshots >:)
When the Dialog box pops up the very top is a radio button change that to ummm wait for it wait...... Send a postcard!!
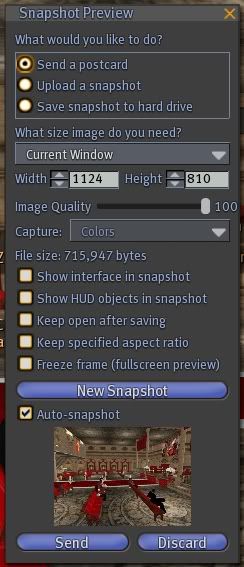 I pretty much keep my settings as this. I want my postcard big and visible.
Post cards are just like taking that cool snap shot of someone or some event in SL but this one you can send to even non SL folks right to their e-mail.
First off you Take a Snap shot just as you do any snapshot in SL. Making Snapshots >:)
When the Dialog box pops up the very top is a radio button change that to ummm wait for it wait...... Send a postcard!!
I pretty much keep my settings as this. I want my postcard big and visible. Fill in the recipients e-mail in the top Box. Then you can explain your Post card maybe say "Wish you were here" or "This isn't what I look like at 5 a.m."

Now normally The above card would have pre filled in your info on Your E-mail and Your Name. I cleared that just to be Secret Agent sender. :D
The two check boxes on the bottom don't work as of yet, but give SL sometime and it will.
Click the Send button and wait. It takes about 5 to 10 minutes for your subject to get their card.
If you want some more tips on Snap shot taking which is the same as this basically check the above link.
Monday, July 2, 2007
Building Ideas
Here are some thoughts on building
If you are lucky enough to own your own Sim/land then you surely can ignore this post.
Get yourself landmarks to a few different sandboxes, you will find that there are more builders now; the sandboxes seem to fill with prims quickly.
Learn your sandboxes, each one has a return policy, some return in 6 hours or 30 minutes, maybe there is a no scripts land, some just clear and you get nothing in your lost and found folder, so save frequently.
Have your textures organized – I can say I have mine semi organized but I have a ton of duplicates and blurred textures.
Learn your prim torturing techniques – wow say that five times fast. A lot of times twisting a prim around will give you ideas on things to make. I have a folder that is filled with odd shaped prims.
If you can afford it, get a mystitool or some sort of platform/builders box. With the influx of new people on SL comes a rump load of new griefers.
If you can’t afford a tool or locate one of the free builder’s boxes just Rezz a 10x10 platform sit on it and shoot the Z elevation to about 300.
Focus on your project –not the sunset or who just flew by- OK OK that’s prolly just me doing that…
Set your drawing distance to 64 I found that when I keep mine at 128 or higher and I’m building that the annoying lag/freeze screen happens more frequently.
Take your time! There again this is prolly just me, I get in such a hurry to complete a project and forget that the reason why to do this is for fun!
If you are lucky enough to own your own Sim/land then you surely can ignore this post.
Get yourself landmarks to a few different sandboxes, you will find that there are more builders now; the sandboxes seem to fill with prims quickly.
Learn your sandboxes, each one has a return policy, some return in 6 hours or 30 minutes, maybe there is a no scripts land, some just clear and you get nothing in your lost and found folder, so save frequently.
Have your textures organized – I can say I have mine semi organized but I have a ton of duplicates and blurred textures.
Learn your prim torturing techniques – wow say that five times fast. A lot of times twisting a prim around will give you ideas on things to make. I have a folder that is filled with odd shaped prims.
If you can afford it, get a mystitool or some sort of platform/builders box. With the influx of new people on SL comes a rump load of new griefers.
If you can’t afford a tool or locate one of the free builder’s boxes just Rezz a 10x10 platform sit on it and shoot the Z elevation to about 300.
Focus on your project –not the sunset or who just flew by- OK OK that’s prolly just me doing that…
Set your drawing distance to 64 I found that when I keep mine at 128 or higher and I’m building that the annoying lag/freeze screen happens more frequently.
Take your time! There again this is prolly just me, I get in such a hurry to complete a project and forget that the reason why to do this is for fun!
Friday, June 22, 2007
Brick a Brac...is that a real word?
Photos: To make some really nice photos
Make a note of any settings you change in case they slow down your system.
Go to Preferences
Advanced Graphics
Check anisotropic filtering Assuming you have a good graphics card, this is enough to smooth ugly edges
Also do this:
Preferences
Graphics Detail If the primary subject of your snapshot is an avatar or object, then consider increasing mesh detail sliders for these things
Then
Hold down Ctrl + Alt + D to enable 'Client' and 'Server' menus at the top of the screen. Select 'Hi-Res Snapshot' from the 'Client' menu.
Oh new cool thing now is Post cards!! Whole blog will be made on this feature.
Neat gadgets
Titlers : Those color text items above your AV. This one gives you a choice of colors and flash.
string command = "";
string person = "";
key owner;
string title;
default
{
state_entry()
{
owner = llGetOwner();
llListen(63,"",owner,"");
llSetTimerEvent(0.0);
}
attach(key attached)
{
if (attached != NULL_KEY)
{
llOwnerSay("To set a title:/63 title
Loop Sound Script: Just jab this in a prim and a wav you want rename the sound part the exact name of the wav.
default
{state_entry()
{
llLoopSound("waterfall sound", 1.0);
//replace "waterfall sound" with the name of your sound of choice (don't forget the quotation marks)
// 1.0 is full volume - 0.0 is silent
//llStopSound();
//Just to make life easy if you need to stop the sound
}
}
Make a note of any settings you change in case they slow down your system.
Go to Preferences
Advanced Graphics
Check anisotropic filtering Assuming you have a good graphics card, this is enough to smooth ugly edges
Also do this:
Preferences
Graphics Detail If the primary subject of your snapshot is an avatar or object, then consider increasing mesh detail sliders for these things
Then
Hold down Ctrl + Alt + D to enable 'Client' and 'Server' menus at the top of the screen. Select 'Hi-Res Snapshot' from the 'Client' menu.
Oh new cool thing now is Post cards!! Whole blog will be made on this feature.
Neat gadgets
Titlers : Those color text items above your AV. This one gives you a choice of colors and flash.
string command = "";
string person = "";
key owner;
string title;
default
{
state_entry()
{
owner = llGetOwner();
llListen(63,"",owner,"");
llSetTimerEvent(0.0);
}
attach(key attached)
{
if (attached != NULL_KEY)
{
llOwnerSay("To set a title:/63 title
Loop Sound Script: Just jab this in a prim and a wav you want rename the sound part the exact name of the wav.
default
{state_entry()
{
llLoopSound("waterfall sound", 1.0);
//replace "waterfall sound" with the name of your sound of choice (don't forget the quotation marks)
// 1.0 is full volume - 0.0 is silent
//llStopSound();
//Just to make life easy if you need to stop the sound
}
}
Friday, June 1, 2007
Some Tiny Tips
To see how your computer is running Crtl-Shift-1
A good standard of numbers is FPS 10-20 with not many people in the sim.
Bandwidth 20-100kbps
Chat:
People can hear you up to 20 meters away and 100 meters in shouts. I think it’s a good rule if you cant read their name title they cant hear you.
Shortcuts:
Ctrl-G Gestures
Ctrl-H Chat History
Ctrl-I Inventory
Ctrl-M World Map
Ctrl-P Preferences
Ctrl-R Run Mode - do it again and you stop running.
Ctrl-T Instant Message
Ctrl-U Upload Image
Ctrl-Alt-T Highlight Transparent
Ctrl-Alt-6 All Fog Off - handy in laggy/foggy sims.
Ctrl-Shift-M MiniMap
Ctrl-Shift-S Snapshots
Ctrl-Alt-Shift-= Turn particle effects on/off.
Ctrl-Alt-Shift-3 Removes all the trees - do it again and they return
Ctrl-Alt-Shift-5 Removes ground cover. - do it again and they return
Bump reports can tell you rammed into you.
A good standard of numbers is FPS 10-20 with not many people in the sim.
Bandwidth 20-100kbps
Chat:
People can hear you up to 20 meters away and 100 meters in shouts. I think it’s a good rule if you cant read their name title they cant hear you.
Shortcuts:
Ctrl-G Gestures
Ctrl-H Chat History
Ctrl-I Inventory
Ctrl-M World Map
Ctrl-P Preferences
Ctrl-R Run Mode - do it again and you stop running.
Ctrl-T Instant Message
Ctrl-U Upload Image
Ctrl-Alt-T Highlight Transparent
Ctrl-Alt-6 All Fog Off - handy in laggy/foggy sims.
Ctrl-Shift-M MiniMap
Ctrl-Shift-S Snapshots
Ctrl-Alt-Shift-= Turn particle effects on/off.
Ctrl-Alt-Shift-3 Removes all the trees - do it again and they return
Ctrl-Alt-Shift-5 Removes ground cover. - do it again and they return
Bump reports can tell you rammed into you.
Sunday, May 6, 2007
Hairy situations
So you bought some hair hey? You right click it and “Wear” and you have bald spots!!
What to do? Run run RUN!! To a Sandbox and throw down a posing stand.
(See Posing Stand)
Ok I believe in safety, so first thing we are going to do is make a copy of our new hair.
What to do? Run run RUN!! To a Sandbox and throw down a posing stand.
(See Posing Stand)
Ok I believe in safety, so first thing we are going to do is make a copy of our new hair.

Open up your Inventory and go to the New hair you just bought and Right click it and “Copy” in that same folder “Paste” your hair again. Then right click the new file and “Rename” (what ever you want to call it) (I usually throw in a "1" after the orignal name).
Throw down that posing stand and lets get to umm Hair Dressing! :D
See the bald spot?
You: “Hey, that isn’t your AV Jacks!!”
Me; “Nope, not only that, I wouldn’t be caught with a bald spot” :D
It's my brothers AV >;)
Right click the Hair and the Edit box will pop up.
Check Stretch (Crtl-Shift) and the Stretch Both Sides radio buttons. You will now see white boxes around your head. Grab one of the ones above your head and “pull up” with your mouse ever so slightly. This will make the hair umm grow :D
 (Aww Mark has some Rogaine)
Yank it up until you don’t see any bald spots on your head. Do it sort of slow so that the hair has time to fully Rezz.

Have a wild hair? ;) in the Edit box check “Edit linked parts” radio button so you can select that one disturbing hair.
Check the “Position” radio button and use the colored arrows to slide it where you want the single hair.
You can now get rid of the other old non fitting hair or keep it and tinker some more.
 Aww hes sooooo pretty!!
Thursday, May 3, 2007
Groups or Lets not be a SL Loner
Groups on SL are like gangs (throws gang sign). You can join up to 25 of them and then SL cuts you off. You can Join them on your own or be invited or MAKE them!!
I made one once called “Scramblers Untie” at the time I hung out in this one place and they had a Scramble ball. (end of story) Joining is easy, if you look around the club or shop you will see a “Join Us” somewhere in the joint. Some are super simple that require one click, some ask you questions about your interests in SL (For shops and their merchandise ideas), Once you join you get a prompt that you have been added to the group. Weeee Now the fun begins!
You will receive group notices by IM or a wicked Prompt usually with an attachment, maybe about a sale (½ price on all clothes) or a party theme (PJ night at the club). I just “OK” them and go on with my SL life. Its good manners not to use that IM chat as your own personal chat IM. Owners use that to give notices -- not us regular kind of folk. :D
On the top of your screen go to Edit and scroll down to Groups… <~~~ umm our subject :D A box will pop up (Aren’t I a popular kinda happening guy in a groovy way….)
There is a listing of all the Groups I am in (Two of them, wow!). You can select one and Click the Activate button and just above your SL name will appear that Group Title.
Info has all sorts of cool tabs on it
Leave is to leave a group ( I had to one time, they were sending too many IMs )
Create ( get to that in below)
Search button (will bring up the search box)
Close (closes the box) :D
Creating a Group… now I had a hard time doing this the first time because I’m stupid. (I'm missing a tiny step and I can't remember and dont have 100 $L to make one so yeah) Maybe I can help you make one.

I made one once called “Scramblers Untie” at the time I hung out in this one place and they had a Scramble ball. (end of story) Joining is easy, if you look around the club or shop you will see a “Join Us” somewhere in the joint. Some are super simple that require one click, some ask you questions about your interests in SL (For shops and their merchandise ideas), Once you join you get a prompt that you have been added to the group. Weeee Now the fun begins!
You will receive group notices by IM or a wicked Prompt usually with an attachment, maybe about a sale (½ price on all clothes) or a party theme (PJ night at the club). I just “OK” them and go on with my SL life. Its good manners not to use that IM chat as your own personal chat IM. Owners use that to give notices -- not us regular kind of folk. :D
On the top of your screen go to Edit and scroll down to Groups… <~~~ umm our subject :D A box will pop up (Aren’t I a popular kinda happening guy in a groovy way….)

There is a listing of all the Groups I am in (Two of them, wow!). You can select one and Click the Activate button and just above your SL name will appear that Group Title.
Info has all sorts of cool tabs on it
Leave is to leave a group ( I had to one time, they were sending too many IMs )
Create ( get to that in below)
Search button (will bring up the search box)
Close (closes the box) :D
Creating a Group… now I had a hard time doing this the first time because I’m stupid. (I'm missing a tiny step and I can't remember and dont have 100 $L to make one so yeah) Maybe I can help you make one.
Top of the SL screen Edit and scroll down to Group , that same box appears this time we Click “Create” .
Another Box will pop up. The very top is a field to type the name of your New Group, its sort of like a profile set up. You can add a picture and then to the right of that give it the Group Charter. I kept mine as a “Open Enrollment” so anyone could join, if you think you are cool enough you can charge for it. I know this umm one Village that if you want to be a Noble you have to pay. (great idea!!) Click the “OK” button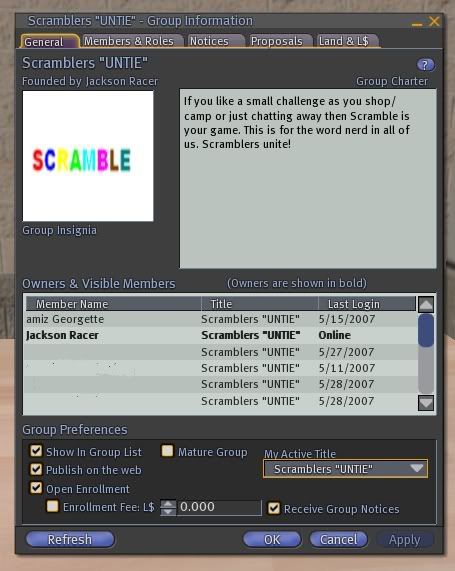 Once you name it SL is going to Pop up with “Creating this group will cost you L$100. Are you really, really, REALLY sure you want to spend L$100 to create this group?” If you click "Yes" then WABAM a new group is created, make sure on the General Tab you change your “My Active Title” to the New group. (There is something on the Members Tab in the lower corner you have to put the name of the Group in again for it to appear on the screen, otherwise you have "Member" showing above your AV name, which got me a few laughs for a while) :D
Thursday, April 26, 2007
Making Snapshots >:)
When I first started SL I didn’t care anything about pictures pfft who needed them? 10 whole Lindens to have a picture? Bah!! I mean really, how can you remember that cool person you met or the fun times? Besides adding them to your Profile and making that nifty picture viewer! (See Picture Viewer) Oh what fun we can have now!
Now what’s cool on this blog page, you can learn camera controls and making that funny Profile and of course the viewer.
“Now, just how do you take a picture Jacks?” you’d say. Well of course you want that perfect setting, then the perfect person to take of or with.
Using the Camera Controls is very handy or the key strokes of holding your left mouse button and the Alt key. Just to get that Photo centered.
You can use the top of your screen under File and scroll down to Take Snapshot or the key strokes of Ctrl-Shift-S. I find the keystrokes are very useful when you want to take that shot (say on a pose ball) and you want it at the perfect time.

Once you save the pic, you can open it in Paint and crop it just as you want. Then File Save As and rename the picture there.
Now to upload that shot, go back to the top of your menu screen in SL under File and Upload Image (L$10) or use the easy key strokes Crtl-U.

Find the snapshot on your hard drive and up load it. There will be a faint "Uploading..." in the middle of you screen and in a few minutes your photo will appear. Click Keep.
 Mine are saved in the Textures folder in the Inventory, so its good to name them as you go, so you can locate them. I then slide it up in the Photo Album Folder (where is should be) :D
You can pass these bad bois along to all your friends or the options above all for free. I think it’s a courtesy, if a pal gives you a snapshot some time you should give one to them in return---
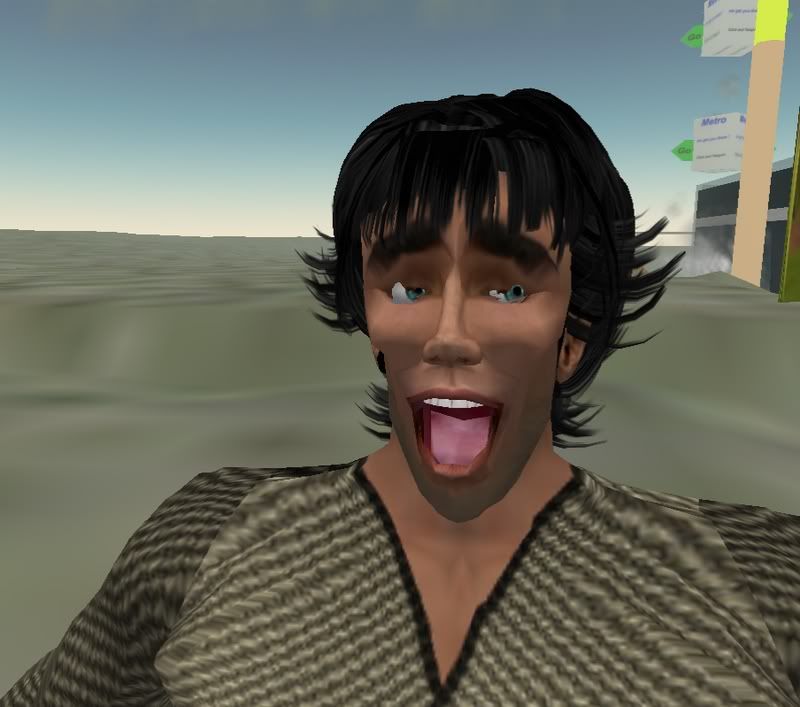 --- Unless it looks like this one......
TIP: For a nice midnight shot
Now what’s cool on this blog page, you can learn camera controls and making that funny Profile and of course the viewer.
“Now, just how do you take a picture Jacks?” you’d say. Well of course you want that perfect setting, then the perfect person to take of or with.
Using the Camera Controls is very handy or the key strokes of holding your left mouse button and the Alt key. Just to get that Photo centered.
You can use the top of your screen under File and scroll down to Take Snapshot or the key strokes of Ctrl-Shift-S. I find the keystrokes are very useful when you want to take that shot (say on a pose ball) and you want it at the perfect time.

Then a box will pop up. I always save my snapshots to the hard drive so I can play with them in Photo Shop or super quick in Paint.
On the Image size (I use Current Window for the very reason why I use my Paint program to crop what I want. )
Capture In Colors
Show interface in the snapshot (gives you the whole SL screen with menu bar and everything on your screen-- Like my Camera Controls)
Show HUD objects in snapshot (is just what it says. If you have a HUD on your screen then its in the picture too)
Keep open after saving <~~ I never use it
Keep specified aspect ratio <~~ I never use it
Freeze frame (Full screen preview) <~~ I never use it
The New Snapshot (is like a retake umm someone blinked)
Auto snapshot (when you open or do the key strokes you will see a picture below)
Save button (will Save that picture --duh)
Discard button (chunks it-- double duh)
Once you save the pic, you can open it in Paint and crop it just as you want. Then File Save As and rename the picture there.
Now to upload that shot, go back to the top of your menu screen in SL under File and Upload Image (L$10) or use the easy key strokes Crtl-U.
Find the snapshot on your hard drive and up load it. There will be a faint "Uploading..." in the middle of you screen and in a few minutes your photo will appear. Click Keep.
Mine are saved in the Textures folder in the Inventory, so its good to name them as you go, so you can locate them. I then slide it up in the Photo Album Folder (where is should be) :DYou can pass these bad bois along to all your friends or the options above all for free. I think it’s a courtesy, if a pal gives you a snapshot some time you should give one to them in return---
--- Unless it looks like this one......TIP: For a nice midnight shot
Crtl P and then Graphics Details
Lighting Details: Check Nearby Local Lights
Do a crtl ~ to take super quick shots
Wednesday, April 25, 2007
Camera controls Not just for snooping anymore!
I like my camera controls, when I first started SL and someone said use your camera controls I thought why the heck? I’m not going to take any pictures I will never need that. Ok, I was so wrong on both counts, I am a picture freak and a Camera Control guru.
There are two ways to access your Camera Controls one is to use your Alt Key and use your left mouse button and swirl around. That does a Zoom in or out and if you continue to hold you mouse button and click the Crtl button the you get the orbit views ( I don’t mean you get orbited, you just float around objects).

The second way is to Click your main menu bar at the top of the screen under View and then Scroll down and Camera Controls. If you do that you get a handy box. The right wheel moves your site of view left or right and up and down. The Left wheel umm swirls you around (for the lack of a better word) Left and right and up and down. These are super Handy as you build or other things……there is a zoom in as well.
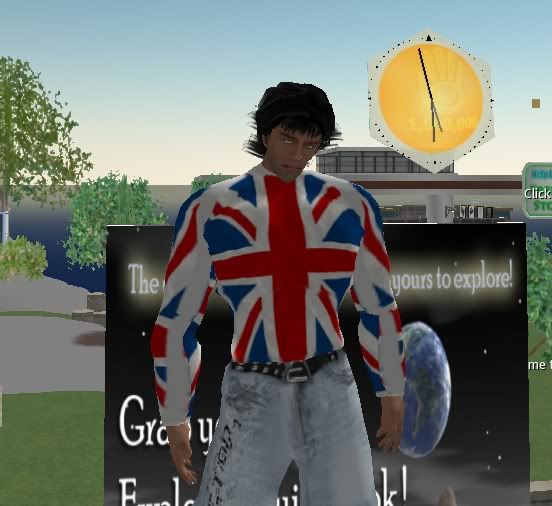
I’m hyper and get bored very quickly and distracted fast…..”Oh a hot-tie at 9 o’clock!” How to see this cutie up close?….Ok this is border line stalking but you can use this for other things.
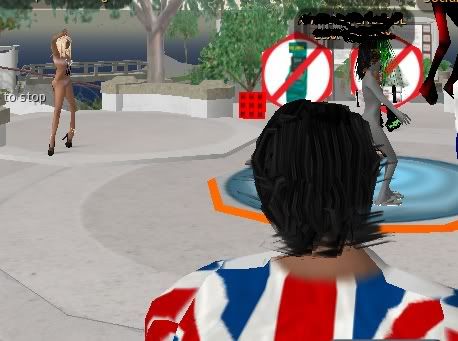
Open up those View controls and Swirl and slide over to your “target”

and see what develops… orrr not :D

You can use this for locked buildings you “Just have to” see in……
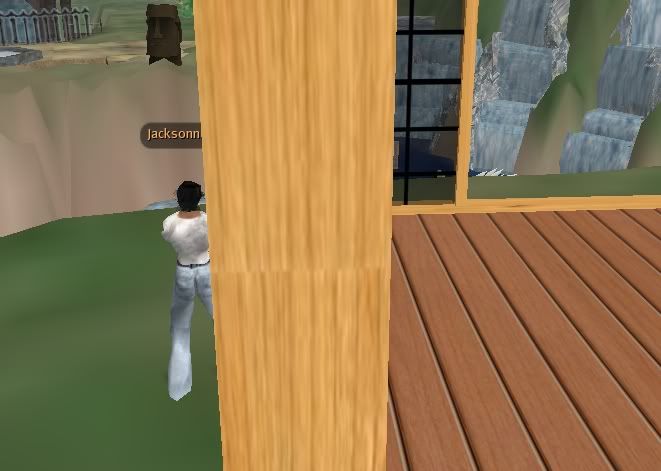
Or great Photo Ops with the love of your life :D

So if you see me in Help Island Public just standing around… I’m prolly using my Camera Controls checking things out…..Give me a wave :D
There are two ways to access your Camera Controls one is to use your Alt Key and use your left mouse button and swirl around. That does a Zoom in or out and if you continue to hold you mouse button and click the Crtl button the you get the orbit views ( I don’t mean you get orbited, you just float around objects).
The second way is to Click your main menu bar at the top of the screen under View and then Scroll down and Camera Controls. If you do that you get a handy box. The right wheel moves your site of view left or right and up and down. The Left wheel umm swirls you around (for the lack of a better word) Left and right and up and down. These are super Handy as you build or other things……there is a zoom in as well.
I’m hyper and get bored very quickly and distracted fast…..”Oh a hot-tie at 9 o’clock!” How to see this cutie up close?….Ok this is border line stalking but you can use this for other things.
Open up those View controls and Swirl and slide over to your “target”
and see what develops… orrr not :D
You can use this for locked buildings you “Just have to” see in……
Or great Photo Ops with the love of your life :D
So if you see me in Help Island Public just standing around… I’m prolly using my Camera Controls checking things out…..Give me a wave :D
Monday, April 23, 2007
Put yer Shoe on Foo!
Have you ever got a new pair of shoes and they attached like this? (ladies don’t check out the sexy legs please).

I made some bikers boots just for funizies the other day and slapped them bad boys on and got that effect. Some how it doesn’t look very appealing. What to do? Well, there is always the Edit tool Box and of course that’s what we are going to use! :D
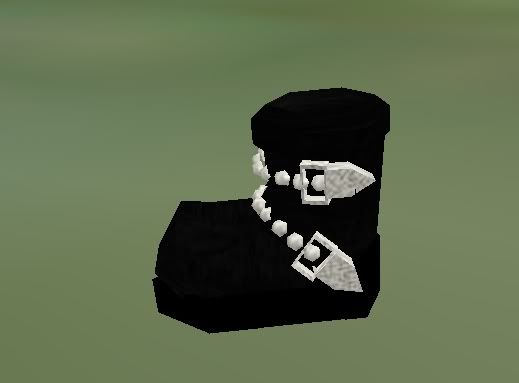
So you right click that mean old; shoe, boot, necklace, ring, bracelet what ever it is that you want to fit on your AV. The Edit Tool box Appears for you.
First we want to check the Rotate Option on the Edit Box and you see that handy wheel, I used the red one and rolled the boot to the proper position. I just click the red wheel and pulled down while still holding on the the wheel.

But what ho! It doesn’t seem to still be on my foot correctly, I think it needs to be pulled out of the ground a bit. So this time, check the Position option on the Edit box and you get arrows, so click on the blue one and it will pull your shoe up.
Some times you have to stretch your objects -- I have a hefty size AV. If you check the Stretch option in the Edit Box you can make it bigger. Just grab the little white boxes and pull or push to the desired size

It’s a good idea to make copies of what ever you are editing. If you cant do that, then just to get used to working with the Edit Options why not Rezz a box on the ground and attach that to your foot (hey you might start a new trend).Then play around with those Edit Options just so you get the power of each one.
I made some bikers boots just for funizies the other day and slapped them bad boys on and got that effect. Some how it doesn’t look very appealing. What to do? Well, there is always the Edit tool Box and of course that’s what we are going to use! :D
So you right click that mean old; shoe, boot, necklace, ring, bracelet what ever it is that you want to fit on your AV. The Edit Tool box Appears for you.
First we want to check the Rotate Option on the Edit Box and you see that handy wheel, I used the red one and rolled the boot to the proper position. I just click the red wheel and pulled down while still holding on the the wheel.
But what ho! It doesn’t seem to still be on my foot correctly, I think it needs to be pulled out of the ground a bit. So this time, check the Position option on the Edit box and you get arrows, so click on the blue one and it will pull your shoe up.
Some times you have to stretch your objects -- I have a hefty size AV. If you check the Stretch option in the Edit Box you can make it bigger. Just grab the little white boxes and pull or push to the desired size
It’s a good idea to make copies of what ever you are editing. If you cant do that, then just to get used to working with the Edit Options why not Rezz a box on the ground and attach that to your foot (hey you might start a new trend).Then play around with those Edit Options just so you get the power of each one.
Subscribe to:
Posts (Atom)